Vegan Chocolate Cake


So I set this blog up after season 1 of GCBS aired thinking I was going to become a food blogger. But frankly it’s a bit exhausting. I find writing difficult and I have a lot of other things I need to be doing! Also I have scaled back the baking somewhat. I enjoy it still but it is not really something that fits with my schedule very much. But now we are all settling into quarantine over the COVID-19 pandemic (can you believe March is not even over!?)  I find I have more time on my hands and a family in need of comfort food.

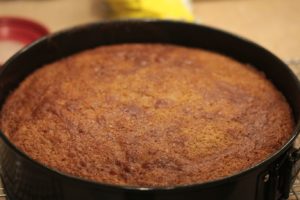
This cake is a strong family favorite. It’s basically the six-minute chocolate cake from Moosewood Restaurant “Cooks at Home” though it is also in their “Book of Desserts”.  It’s a fantastic, works-every-time recipe. The page on our copy of Cooks at Home is easy to find because it’s the one which is absolutely covered in cocoa powder.  It’s super easy to make and vegan.  This cake gets its lift entirely from the baking soda – vinegar reaction. You mix everything except the vinegar right in the cake pan and then swirl in the vinegar just before you put it in the oven .

I make a couple of changes though. First I use half as much sugar. I find in general that many cake recipes are too sweet. In particular I don’t like my chocolate to sugary!

Also the recipe calls for just unbleached flour but recently I happened to use pastry flour and it makes a big difference! Finally I use balsamic vinegar rather than the apple cider suggested. I think it brings another subtle layer to the flavor. I used a vanilla flavored balsamic most recently which someone happened to regift me at Christmas and has been cluttering up my cupboard ever since!

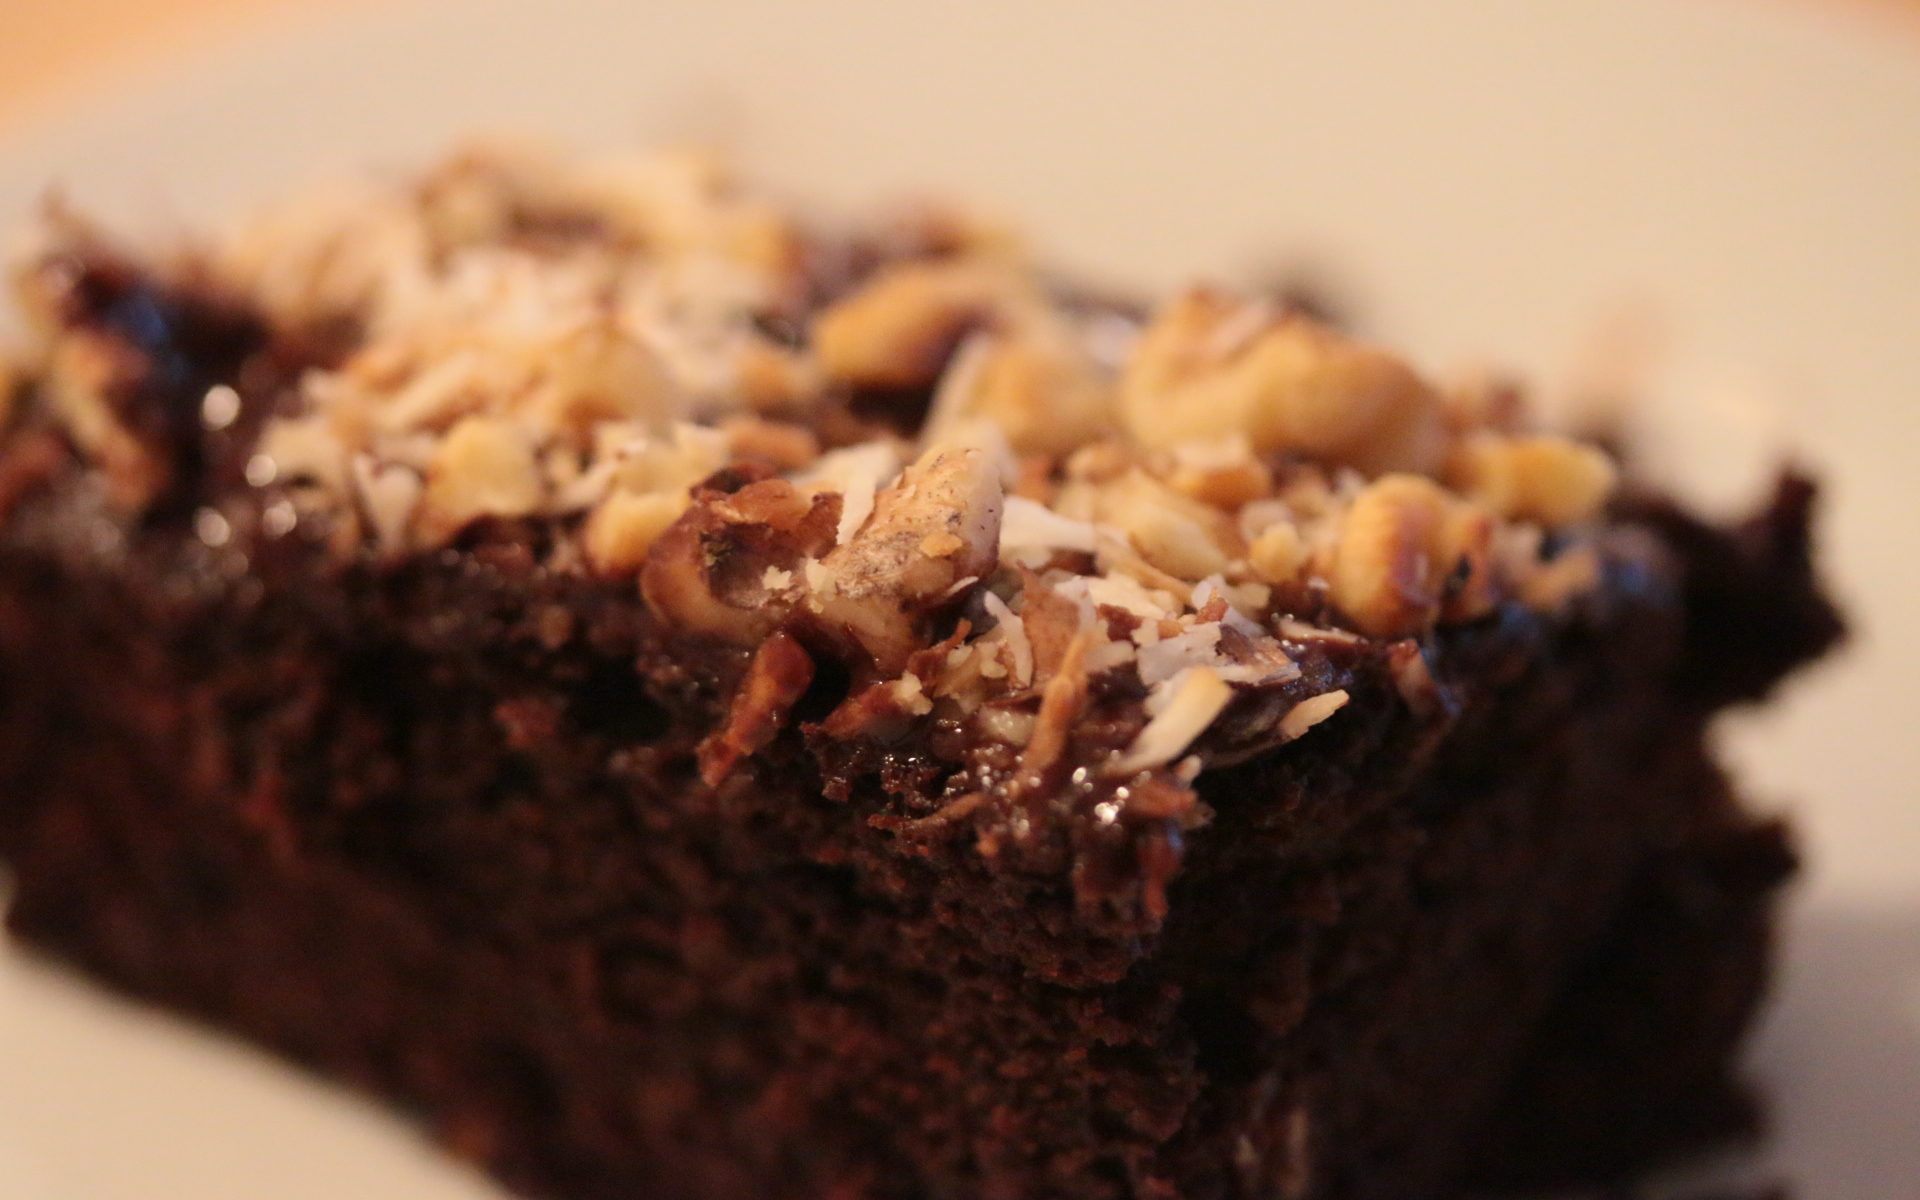
I have also here veganized the glaze. The original is a basic ganache made with milk or cream. I have done it that way (I’m not actually vegan myself) but this time I had not dairy in the house so I used cashew milk. I upped the fat content a bit though by adding some coconut oil. That does bring a coconut flavor to the ganache but I leaned into it and topped the whole thing with  a crunchy topping of toasted walnuts and coconut flakes.

By the way this recipe makes rather too much ganache for the cake but I find it difficult to make it in smaller batches. The excess keeps well in the fridge and if nothing else can be eaten with a spoon later!

One more thing – the original recipe says you can use either coffee or water. But seriously you need to use the coffee – I have done it with water and it is NOT the same.

Recipe

Cake

1-1/2 cups Pastry Flour
1/3 cup unsweetened cocoa powder
1 tsp baking soda
1/2 tsp salt
1/2 cup sugar
1/2 cup olive oil or other vegetable oil
1 cup of brewed coffee (this is important!)
2 tsp vanilla
2.5 tablespoons balsamic vinegar *

Glaze

200g 70% Dark Chocolate
3/4 cup non-dairy milk (I used cashew milk)
2 tablespoons Coconut oil

Topping

Handfull Chopped Walnuts
Handfull Dessicated coconut


Method

1. Preheat your oven to 375F or 190C.

2. Sift all the dry ingredients into an 8 inch square oven proof dish.  Give them a little swirl around to mix and make a well in the center. I use a glass dish and it doesn’t need greasing but metal might.

3. Mix all the wet ingredients (except the vinegar!) then add them to the dry. Make sure it’s all well mixed with no dry spots of flour.

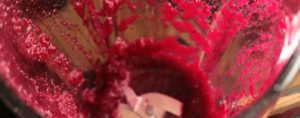
4. Finally pour all the vinegar in and give it a mix to make it well distributed. You should see a marbling effect starting – that’ the baking soda and vinegar reacting so you have to put the cake in now before the reaction runs out.

5.  I find it needs about 35 minutes in my oven but check at 25 to see if a knife in the centre comes out clean.

6.  In the last 10 minutes spread the coconut and walnuts on a baking sheet and put them int the oven with the cake. Keep an eye on them, while they toast to your preferred level. I like the coconut just starting to brown. Take them out and transfer them quickly to a bowl to cool.

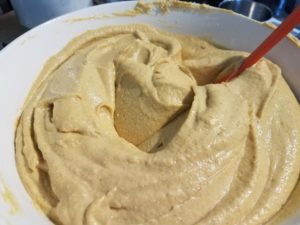
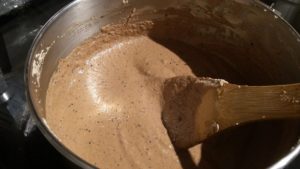
7. While the cake is cooling make the ganache. Roughly chop your chocolate and set it aside.

8. Mix the oil and nut milk in a microwave proof jug and microwave for about 50 seconds to a minute to get it warm. It should be slightly too hot to touch the dish but not boiling.

9. Drop in about 3/4 of the chocolate and let it sit for a moment. Then stir vigorously until it is silky smooth looking. Keep adding the rest of the chocolate a little at a time until it is all melted.

10. Once the cake is cooled and removed from the pan, pour the ganache over the top (if it has cooled to much you might want to warm it back up briefly int eh microwave). Top with a generous sprinkle of the walnut and coconut mix.
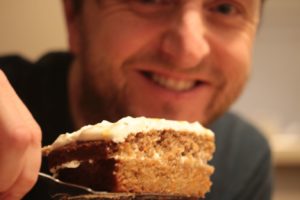
Enjoy!

Please follow and like us:

Vegan, gluten-free and diabetic friendly Pumpkin Cheesecake

I love pumpkin pie! In particular I love the spices, the sweet eggy custard and the crumbly shortcrust pastry. So in other words I love the sugar, gluten, eggs and dairy which traditionally make up this dessert. But this year our thanks giving dinner was going to have accommodate diabetics and the gluten intolerant so my challenge was to come up with a delicious desert which also ticked all the health boxes. The lactose in milk products such as used in a traditional custard can spike a diabetic’s blood sugar so I wanted to try and go vegan. I’ve had some mighty fine vegan cheescakes based on cashews so that was my starting point. This once uses soaked cashews and silken tofu as the “cheese” in the cheesecake. Arrowroot powder is the binder. I never like using broken up cookies for cheescake bases – seems like cheating to me! Here I used  ground up pecans and more cashews to give a nutty and protein rich flavor. I added psyllium husk powder which works as a binder but is also believed to have some positive effects on people with type 2 diabetes. Ground flax would also work well here.

The spices are of course a matter of taste – I like a bit of spice and I think it reduces the need for sugar. I measures in the recipe but I usually just eyeball spices! Talking of sugar, I wanted to limit the amount of extra sugar so I tried a commercial sugar replacement from Krisda based on monkfruit and Erythritol. It’s not exactly like sugar but can be subbed 1 for 1 into baking products. It’s the first time I tried it so I did put a little bit of real sugar in as well but it might be ok to do without it altogether. Or if you don’t need it to be suitable for diabetics you could probably just use sugar.

It seems a huge number of vegan recipes call for a good blender and this is not different! You really want to make the filling very smooth. My Oster has great power but I still needed to do it in small batches to get it to the texture I wanted.

Ingredients

Filling:

350g silken tofu
2 C raw cashews (soaked or boiled for 10–15 min)
2 C pumpkin puree (about a 4 pound pie pumpkin)
2/3 C dry sweetner*
1 tbsp Lemon juice
2 tbsp arrowroot powder
1/2 tsp salt
2 tbsp Cinnamon(guesstimate! I probably used a bit more than that)
1 tsp Cardamom
1 tbsp Powdered Ginger
1/2 tsp Nutmeg

Crust:

1 C raw cashews
1 C pecans
1/2 cup coconut oil
1/4 cup of dry sweetner.*
1 tbsp cocoa powder (optional)
1 tbsp Psyllium husks or ground flax


*Dry sweetner: I wanted to make this a diabetic friendly dessert so I used Krisda Monkfruit Sweetner which is a blend of Monkfruit extract and Erythritol. I did use a couple of tablespoons of actual sugar in the filling but I’m not sure what difference it makes. If making the dessert diabetic friendly is not ctitical for you, you could go ahead and use regular sugar.

Method

Preparation:

1) Put 3 cups of cashews in a bowl and cover in cold water. The cashews will swell as they soak so make sure your water leves is a good inch over them.
2) Cut pumpkin in half. Put cut halves down on a roasting pan and roast for about 40 minutes at 385C. The flesh should be tender and mashable. Scoop it out, discarding the seeds and stringy material, and place it in a sieve over a bowl to let it drain and cool for a good hour. You should have about 2 cups or more.

Making the filling:

1) Drain the cashews and give them a quick rinse. Take 2/3 of them (will be a bit more than 2 cups after soaking) and mix with the silken tofu. Blend on super maximum high until *very* smooth. You really want this to be as smooth as possible here.
2) Add the puree to the other ingredients and mix well. Working in batches, whiz the mix in the belnder until it is as smooth as possible. It should have a thick, smooth consistency like a really thick custard. If it is too runny you can try adding more soaked cashews and a bit more arrowroot.

Pumpkin cheesecake filling

Making the crust:

1) Quickly blitz the pecans and cashews to coarse crumb.
2) In a bowl mix with coconut oil, coco powder, psyllium husks or flax, sugar (or substitute) and spices. The mix should clump together into a ball when you press it in your hands.

Putting it all together:

1) Grease 9 inch springform pan with coconut or other oil.
2) Press the filling into the bottom of the pan. I like a good bit of crunch in my cheescakes so I go for about a 1+ cm layer.
3) Pour the filling in and spread into an even layer with an offset spatula or knife.
4) Bake at 325C for 40 minutes.
5) When done the edges should have browned a little bit and the center should still be soft.
6) It will probably crack a bit as it cools but this is ok.

Fresh from the oven

Decoration:

1) I put a ring of pecan halves and then melted some chocolate and poured it in a spiral pattern. Unfortunately I had tempered the chocolate and so when slicing, the chocolate spiral cut into soft filling. Net time I would mix a bit of coconut oil in with the melted chocolate to keep it soft.

Please follow and like us:

Vegan Coffee-Cashew Cheescake Bites

So for some reason I got a bit of a reputation on TGCBS for producing “ugly but delicious” items. I have literally no idea where this reputation came from  …

… well ok I have some idea but the point is have been keen to try and prove that I can also do pretty (given enough time!). So when I got invited to come up with some vegan petit-fours for a posh party I thought this is my chance to show I can make something delicious and pretty! Unfortunately the party got cancelled but I did come up with this tasty little treat.

I wanted to make a sophisticated dessert and was inspired by a fantastic cashew based cheesecake I had at Be Love in Victoria last year. So this starts off as a cashew cream infused with coffee. This is then treated like a custard and thickened with arrowroot powder. The base is loosely based on the nutty pie crust from “How it all Vegan” by Tanya Barnard and Sarah Kramer – one of my favorite cookbooks. I don’t have lots of little molds and whatnot for making mini cheesecakes so I hit on the idea of doing it with ice-cube trays. It turned out pretty well.

The desserts have a strong coffee flavor and are best served a little chilled – they start to get very soft when they reach room temperature and you will definitely not look elegant and sophisticated if you try to eat them like that!

Warning: these have quite a few steps, are a little fiddly and since they use a lot of cashew nuts they are kind of expensive so you might want to save these until you have a special event.

Crust

0.5 cups of almond flour
0.5 cups strong white flour
0.5 cups of walnuts
1 tbsp brown sugar

Filling

1 cup raw unsalted cashews, soaked for 4 hours
1 1/4 cup  Brewed coffee, plus more to taste
2 tablespoons pure maple syrup, plus more to taste
1 teaspoon natural vanilla extract, plus more to taste
Pinch of salt
3 tbsp coconut oil
2 tbsp of cocoa powder
2 tbsp sugar
2 tbsp ground coffee
1 tsp cinammon
2 tbsp arrowroot powder

Topping

85% Dark chocolate tempered (no milk ingredients)
1 cup cashews
2 Tbsp maple syrup
1/2 tsp corse salt

Method:

  1. Drain the cashews, and discard the soaking water.
  2. Pour half the brewed coffee into the blender, and add the soaked cashews with the maple syrup, vanilla, and salt. Blast on high for 30 to 60 seconds, until smooth and creamy.
  3. Add the cashew cream to a saucepan with the rest of the coffee, coconut oil, cocoa powder, ground coffee, sugar and cinnamon. Simmer very slowly stirring all the time until thickened to avoid burning.
  4. Once fairly thick, strain the mixture through a fine sieve. Try to get as much liquid through as possible. I use a wooden spoon to continually stir and push the mixture through the sieve and then a rubber spatula to scrape the material from the underside. Reserve the residue from the sieve.
  5. Put the strained liquid into another pan, add the arrowroot powder. Just to a simmer stirring until a pipe-able consistency.
  6. Whip the cream vigorously (I’m not 100% sure this achieves anything but it seems a bit lighter as a result) and let it cool for a while.

Make the crust

  1. Preheat the oven to 375°F
  2. In a food processor mix the flours, walnuts and sugar until a fine crumb.
  3. Mix in the reserved residue from the filling (should be about 1/3 cup) until it comes together as a dough.
  4. Roll about 5mm thick and bake for about
    8-10 minutes (should still be fairly light and spongy)
  5. Cut into pieces rectangular pieces 1″ x 1.5″ (or whatever size your molds are going to be)

Assemble

  1. Pipe the filling into prepared molds. Press on bases. Freeze until set.
  2. Once frozen top with lines of tempered chocolate (I used 85% dark chocolate – for a good tutorial on chocolate tempering see: Food52 or about 1000 YouTube videos!)

Maple roasted cashews.

  1. Mix whole cashews maple syrup and salt a dspread on baking sheet 10-12 minutes until nicely browned
  2. Place a single roasted cashew on each dessert (stick with tempered choclate if necessary)
  3. Bring to room temperature before serving


Please follow and like us:

February Baking Challenge: Valentine’s Challah

So our February theme of the GCBS Season 1 gang was a Valentine’s bake. I’ve gone for a multi-cultural mashup with a Valentine’s day Challah woven into a Julehjerte , which is a traditional Scandinavian Christmas decoration which happens to be shaped like a heart and so works Valentine’s day too! Julehjerte are super easy to make (with paper!) and are traditionally red and white. So I wanted to use red and white dough. I hate using food coloring so I made my red(ish) dough by adding roasted beets. The recipe is based on the Smitten Kitchen “best challah” adjusted with tips from my mate the Litibaker.

I’ve split the recipe into 2. One for the “white” dough and one for the “red” dough. Adding the pureed beets obviously adds some additional moisture to the red dough and it’s hard to work out how much. My beet puree weighed 160g and I worked on the assumption that 50% of that was water and reduced the water in the dough accordingly. However, the red dough was still wetter and so I think it is more like 60% but you may have to judge for yourself. My beets were some we had roasted and frozen a few months ago.

Valentine Challah

I was pretty happy with this for a first try. I worked out the braiding method on the fly and had to re-do it a couple of times so I think I rather over-handled it so it ended up with a bit of a bulge on one side. Like a valentine’s aneurysm!

Recipe

Active dry yeast 2 x 6 grams
Granulated sugar 2 x 1 tsp
 Water (white dough)  210 ml
 Water (red dough)  130 ml *
 Pureed roasted beets  160 grams
Olive oil 2 x 60 ml
Salt 2 x 2 tsp
Egg yolks 8
All purpose flour 2 x 375g
Wholewheat flour 2 x 125g
Granulated sugar 2 x 50g

So the we just happened to have roasted beets in our freezer. If you don’t have them on hand,  peel about 3 smallish or 2 mediumish beets and roast them at 400F / 200C until tender – about 30 minutes depending on size. Then let them cool completely.

The beets then need to be pureed in a blender until as smooth as you can get. I weighed out the beets at 160g which seems about right. You are aiming for 210ml of water in each dough so I assumed 50% water in the beets and reduced the water in one of them to 130ml.


Pureeing beets

Set up two large bowls. Add water yeast and the smaller amount of sugar to both bowls and wait until foaming nicely (about 5 mins).

Add the beets to the bowl with the smaller amount of water and mix in the olive oil and salt to both and whisk together well.

Whisking the valentine doughs

Whisk 4 egg yolks into each of the bowls along with the larger amounts of sugar.

Add the flour a little at a time (this is important). Start by whisking, then switch to a spoon and finally your hands. I did one of the doughs at a time. You may not need all of the flour.  You are aiming for a soft elastic dough.

Once you have two similar feeling dough balls, oil them and place them in oiled bowls, cover and let rise for at least an hour (doubled in size).

Punch them down and leave them to rise again for about another half an hour.

Turn out the doughs and roll into rounded oblongs about 6 or 7 inches wide. Fold them over in half to make two kind of “tombstone” shaped dough pieces. Roll them again to about 3/4 inch thickness.

Doughs for Valentines Challah


Shaping the Challah

You should have a couple of long pieces with a semicircular end and a flatish end. With a sharp knife cut equal length parallel lines from the flat end to make 6 equal width strips attached to the semicircular tops. My daughter says they looked like a couple of octopuses!

Now the shaping … bear with me! Lay the white octopus over the red octopus so the tentacles overlap at right angles. The heads of the octopuses will form the two upper lobes of the heart. Fold back the white tentacles over the white octopus head and fold back the red tentacles. Now lay every other white tentacle back down and put down the first red tentacle down over them. Lets call the white tentacles you laid down group A and the others group B. Fold the group A tentacles back and lay the group B tentacles down. Then lay the next red tentacle down. Keep doing this, alternating group A and B until all the red tentacles are done.

Weaving the Valentine Challah

Trim any excess off the tentacles (I had a lot of red left and no white – enough to make a couple of little extra buns). tuck any loose ends under. Brush with egg yolks.

Valentine Challah ready for the oven

Set the loaf aside and preheat the oven to 400F.

Bake the load for 15 minutes then turn the oven down to 375F and bake for a further 15-20. I overbaked mine a bit.

Valentine Challah Slice Shot


Please follow and like us:

January Baking Challenge: Carrot Cake

So it seems that me and my baker friends from GCBS Season 1 are now in a co-dependent relationship where we can’t stop competitively baking with each other. We decided to set ourselves a challenge a month and this month we chose carrot cake – for no other reason than a couple of us seemed to be making them anyway! So I like carrot cake but they can get a bit samey so I wanted to try something a bit different. One of Judith’s favorite desserts is the Indian Gajar ka Halwa – a pudding of grated carrots, cardamon and milk. I thought it would be a brilliant idea which no one had ever thought of before. Of course they had. There were a few out there but I adapted this one a bit from Sunoj and Teena’s Kitchen at Ooonuready . I didn’t have any ghee so I subbed butter and coconut oil. I also added a ricotta and whipped cream frosting.

The recipe takes a bit of time because first you have to make the Gajar ka Halwa. I made too much but Judith didn’t mind because it keeps and is delicious any way! I wanted to make a creamy frosting but not cream cheese – mostly because I didn’t have any! I did however have a carton whole milk I’d bought on sale and needed to use up. So I decided to make a frosting with ricotta and whipped cream. Also someone, I think it was Vanadana, told me that Indian paneer cheese is basically the same as ricotta so that seemed appropriate to an Indian themed  cake!

Recipe

Gajar ka Halwa

Carrots 500g
Milk 200ml
Coconut oil 50g
Cardamom 2-3 tsp
Sugar 50g
Raisins Some, or none, or lots

  1. Grate the carrots.
  2. Melt the coconut oil in a wok or medium saucepan on a medium heat.
  3. Add the carrots and stir to coat well with the oil. Saute for a little while.
  4. Add the milk, sugar and cardamom and simmer gently stirring frequently to prevent sticking.
  5. Once it has cooked down and reduced in volume by about a quater add the raisins and continue cooking for about 5 minutes.
  6. Take off the heat and set aside to cool a little.

I’m being deliberately vague with the spice. I felt like it needed a bit extra so I put 3 tsp if you’re not so keen scale it back.

Sponge.

All purpose flour 150g
Wholegrain spelt flour * 100g
Baking powder 2 tsp
Baking soda 1 tsp
Butter 250g
Sugar 250g
Eggs (separated) 4
Milk 1/2 cup
Vanilla essence 1 tsp

* This is optional you could also use wholewheat or if you like just use 250g total of AP flour.

  1. Generously butter a 9 inch spring-form cake pan and preheat the oven to 180C (355F)
  2. Sift the flours and baking powder / soda into a bowl.
  3. In a separate bowl or in a mixer cream together the butter and sugar
  4. Whisk in the egg yolks one at a time and fully incorporated
  5. Put the butter/sugar egg yolk mix in a separate bowl and clean your mixer bowl thoroughly (Ah man really?!)
  6. Whisk the egg whites to stiff peaks (see that’s why you needed to clean your bowl)
  7. Now fold the egg whites gently into the butter/sugar egg yolk mix being careful not to knock too much air out.
  8. Add the flours and milk a bit at a time and fold it all together.
  9. Now fold in two cups of the gajar ka halwa mix (eat any leftover!)
  10. Bake for a good 50 minutes until it passes the toothpick test.

Whipped ricotta frosting

Whole milk* 1 litre
Apple cider vinegar or lemon juice* 1/4 cup
Salt* 1/2 tsp
Whipping cream 1/2 cup
Vanilla to tase

* OR: just use 125g of bought ricotta cheese.

If you’re making your own ricotta:

  1. Heat the milk and salt in a pan to 165F stirring constantly
  2. Remove from heat. Add acid and stir briefly.
  3. Allow to cool and then strain through a cheesecloth for about 20 minutes

Then: put the ricotta and the rest of the ingredients together in a mixer and whisk with a balloon whisk until light and fluffy.

Assembly:

Once you have all the components and the cake is cooled. Cut the cake in half sandwich style and spread the frosting between and on top, either piping or just spreading. To garnish I warmed up a bit of honey with cardamom and drizzled it over the top.

Please follow and like us:

Bake #11: Maple Cookies

The Challenge:

Make N identical Maple Cookies

What happened?

So I was rather surprised by this bake. They are rather plain looking maple shaped shortbread sandwich cookies with a maple butter filling. It occurred to me straight away that this was going to be a close one to judge. Any baker of reasonable skill should be able to make shortbread cookies. So the trick here was obviously going to be to have them absolutely identical, perfectly baked and flawless. So right in my ballpark … erm, maybe.

Well I turned out some pretty good looking cookies. But then so did everyone else! This is going to be close

Judging:

There was really not much to tell between all our cookies by looking at them. Bruno and Rochelle must have had a genuinely hard time ranking them. But never the less I came second and I’m pretty proud of that!

Overall:

This was quite an enjoyable bake. However the thing I remember most from it was one little moment. I was putting the raw sugar on top of the cookies before baking. I was leaning close over them concentrating hard on getting an even distribution. The sunlight was coming in from my left and the light was just beautiful with the golden sugar. The cameraman was really enjoying capturing the light and getting a great shot. I think the only shot from it that made it to the cut was the featured image here.


Please follow and like us:

Bake #10: Tourtiere

The Challenge:

Make an interpretation of a Tourtiere along with a sauce or relish to go with

My Bake:

A vegetarian tourtiere with spicy tomato relish

What happened?

So this particular bake I practiced a lot. My family were subjected to 3 tourtieres one particular week. In the middle of summer! But I think it paid off. Although confident my tourtiere was a great vegetarian version I still had some nervousness that the vegetarian option might count against me. A lot of professional chefs are somewhat dismissive of vegetarian cooking and Bruno certainly raised an eyebrow when I told him there was going to be no meat!

The bake starts with a rye shortcrust. Rye is great to make shortcrust pastry with. Not only does it add a lovely slightly nutty flavor, but because it relatively low in gluten. Too much gluten formation ruins a shortcrust leading to tough dough and soggy bottoms. That’s why you work cold butter into the flour and use tiny amounts of very cold water, water also activates gluten production. In this pie I used just under 40% Rye. I also used cold vodka instead of some of the water. This is another good trick – it adds moisture to make the dough workable but does not promote gluten formation. The vodka evaporates off in the oven and leaves no flavor.

As I say, I was feeling pretty confident but things didn’t actually start all that well. To make the shortcrust I grate frozen butter with a box grater. Now a box grater is one of those kitchen tools that pretty much everyone has. If you’re like us it kicks around in a drawer, gets fairly heavily used. You’ve probably had it for ages. Can’t even remember where you got it. Probably you bought a super cheap one when you first started making grilled cheese sandwiches for yourself as a student. Maybe a relative gave you their crappy extra one when you moved into your first home. Most importantly – it is not sharp. It has never even occurred to you that it could be sharper than it is. Well in the tent we had brand-spanking new ones from show sponsor Cuisinart and they were SHARP! As I grated my butter, as often happens, the butter slipped and I ran my thumb-knuckle down this little wall of evil razor blades. There was a surprising amount of blood pretty much instantly and I stuck my hand in a nearby bowl of ice-water while the paramedic came to sort it out. For the rest of the show you’ll see I was wearing gloves a lot of the time. The cut (or rather multiple cuts one on top of the other) took weeks to heal and I still have a scar – suffering for my art I guess 🙂

Other than that everything went smoothly. The filling came together nicely while I blind baked the pie case. I must say the tent smelled fantastic on that challenge and we all appreciated baking something savory after all the sweets. I had got hold of some swim goggles for the pool at our hotel – I hate swimming without goggles – so I thought it would be totally hilarious to wear them while I chopped my onions. It’s an old gag but hey what the hell!

We had one last hicup. With about 20 minutes left on the clock a huge thunderstorm rolled in. Rain was battering the tent and some serious mopping needed doing. The for a short while they had to turn off some of the power including the ovens. We all stood around biting our nails and worrying about our bakes. As long as you don’t open the door a new oven should hold its heat pretty well and so they did. So it didn’t really make much of a difference to anyone other than adding a layer of stress!

Judging:

I was very happy with my tourtiere – it looked pretty good and smelled pretty good but I was still nervous when Bruno and Rochelle got to my bench. I will never forget how surprised they both looked when they cut into the pie and took out a slice. I held it’s shape perfectly. It looked delicious. And both were very surprised by the taste. To be clear it does not actually taste of meat. But it has a texture which is very close to the texture of a ground meat filling and has a very strong rich flavor which somehow reminds you of meat. Someone said it tasted somewhat like stuffing. Whatever, Bruno and Rochelle were both very impressed.

Overall:

As I said in my after-bake interview: “Mission accomplished”. I had been particularly worried about Bruno not liking the vegetarian angle. But I think in the end I pretty much knocked that one out of the park!

I have had some comments that my pie was not a tourtiere for the simple reason it was vegetarian. To which I say – meh.  This was a signature challenge not a technical so by definition there is going to be a wide range of interpretations. I think my tourtiere was actually closer in flavor to a traditional one than some of those that used meat. I tried to deliver a tourtiere-like experience without the meat and I think I succeeded. Can I call it a tourtiere? I can call it whatever I like – I made it. I’m not a great believer in tradition anyway – rules were made to be broken. Plus, I’ve been vegetarian for coming up to 28 years – I’m not about to make a meat pie now, baking show or no baking show!

Recipe:

This recipe is available on the CBC website at here.


Please follow and like us:

Bake #9: Pavlova

The Challenge

Make a pavlova

My Bake

A grilled plum and chocolate pav with praline shards

What Happened?

Well pavlova is a popular dessert in our household and we’ve made quite a few so feeling good. Plus I am really happy with my recipe, it’s come out well in practice. The main star of the show here of course is the meraingue which should be crispy on the outside with a nice chewy center. Meraingue is very susceptable to the ambient climate so to get it just right you have to take into account the weather. Practicing in Richmond it had worked very well. But it had been a warm summer and not too humid. In the tent in Toronto the humidity was very high and i was very worried about the meraingue not drying out at all so I made a decision to leave it for longer in the oven. A decision I would regret!

For the plums I was grilling half and cooking down some other to make a sauce. Then there was a marscapone cream. Marscapone goes beautifully with grilled plums. In fact if you want a simple but yummy dessert just grill some halved plums with a little honey drizzled on, then whip some sugar into marscapone and dollop it on the plums – fantastic! For the sauce component I had been peeling the plums so I could get a nice smooth sauce but after a raised eyebrow from Bruno and Rochelle I switched to leaving the skins on – great idea – much more colorfull sauce!

So we come to final assembly. All the components looked great. I had also made a sheet of almond brittle. Actually I’d made two sheets – one of which had come out far too thick so one of the cameramen had been nibbling it all through the bake! I was aware that we were getting close to time but I wasn’t sure how close. I had my meringue cream layers piled up along with the grilled plums and now I was carefully cutting up my brittle into artfull shards for the top when someone said “15 seconds left”. What???!!!! So I picked up the entire sheet and smashed it onto the bench. Then grabbing shards in both hands started ramming them into the top. Time’s up!!!

Adreneline rush but overall pretty happy

Judging

So the thing about pavlova – like so many baked goods – it might look fine on the outside but you really have no idea if it’s worked until someone cuts into it. So with my pav – the judges liked the look (for once!) but as they cut in we discovered it was dry through and through. I had overcompensated for the humidity. On the plus side they enjoyed the flavor so I think all in all I should be ok

Overall

I was still very happy with the bake. I delivered it on time and looking pretty good and tasting delish! Shame about the meringue but I felt it was an honest misjudgement which didn’t take too much away. Plus it was a meringue with incorporated chocolate which the judges acknowledged was trickier so all good. Feeling in the middle of the packish

Sentencing

Well us boys are not doing well! I was very sad to see Cory go he’s a star and had a lot of great baking experience. As the show progresses we are all bonding more and more and it gets harder and harder to say goodbye!

Please follow and like us:

Bake #8: Fondant fancies

The Challenge:

Make N fondant fancies

What Happened?

When I was kid in the UK our parents used to buy fondant fancies fairly regularly. You got 8 in a box. There were 3 pink, 3 chocolate and 2 yellow (lemon? – who knows). Me and my 2 brothers were entitled to 2 each. Now because there were only 2 of the yellow ones they acquired that air of rare specialty. So between us we would fight as to who was getting the yellow ones this week and who was going to have to lump it with a chocolate one (we all got 1 pink). Frankly they probably all actually tasted pretty much the same but the chocolate one seemed so oridinary compared to the pink and yellow so they were allways the bottom of the pecking order.

The commercial ones consisted of a little square of sponge up on which sat a little dome of some sort of creme. The whole thing was then covered in a layer of colored fondant and a few parallel lines of icing. The ones we’ve been tasked with are going to be similar apart from a jam sandwich layer in the middle and no creme blob on top. There is also going to be thin buttercream layer on the outside and the fondant will be plain white. Specifically it is something called pate a glace which is something I’ve never heard of so another learning experience

First up we bake a cake. Then we make a french butter cream. Then, when the cake is done we do a bunch of careful measuring and cutting to assemble perfect little cubes. And yes, again, we used pre-made jam to sandwich the layers together. Once we’ve got all these buttercream covered cubes ready, it’s time to glaze. This is the trickiest bit. The temperature is absolutely critical here, the pate a glacer has to be heated to and held a fairly precise temperature for perfect pouring. In the recipe it only says “body temperature” so there’s a little inbuilt biology test here too! My first one looks absolutely perfect. I am ecstatic. I’m going to rock this challenge! So away I work, unfortunately I stop paying careful attention to my glace temperature and soon it is too thick to pour. Then I heat it up and it is too runny. So little by little my inherent scruffiness starts sneaking back in and although they look not bad I have moved from ecstatic to meh. Then as I look around at the others I start to realize mine are not the best. Man can’t these people screw up more often?!!!

Judging:

Oh 6th? Well that was disappointing. I was sure I’d done better than that. Oh well, onwards and upwards.

Overall:

Nope. Never making those again. Waaay too much work for what in the end is just a little cake cube with too much sweet icing on.

Please follow and like us:

Bake #7: Elegant Pie or Tart

The Challenge:

An elegant pie or tart

My Bake:

Coffee and salted caramel custard tart

What happened?

Hmm, elegant you say? Weeell I’ll see what I can do. So this pie uses a beautiful French butter crust. Unlike a traditional shortcrust where you try to keep everything as cold as possible, here you heat butter and start to caramelize it before adding the flour. It makes a beautiful sweet, nutty flavored crust. That’s going to be baked separately because what I’m making here is a “composed pie” – filling and crust are made totally separately and then just put together.

So basically there are just 3 elements: the crust, the custard and the caramel. Crust goes fine, came together nicely, rolled out and into the oven. Custard also fine but I slipped behind a bit on the crust and the custard – a coffee infused cornstarch thickened custard – had to go into it hot which made me very worried about it setting. Unfortunately it had also thickened a bit too much before adding it to the pie which meant it had to go into the pie hot – not good for setting.

It was all a bit tight but the custard was more or less set and although I was rushed it was all going not too bad. Then came the caramel. So the idea here was to pipe a fairly elegant little design also incorporating the Greek letter pi – geddit?!  It was meant to be salted caramel but when I came to add the salt I discovered I only had coarse kosher type salt on the bench. I was getting a bit pressed for time so I quickly through it in rather than asking for fine. This was my downfall. I put the caramel in a paper cone I’d made and cut a very small tip so I could pipe fine lines. Unfortunately one of those big salt flakes got caught in the end and as I pressed to push it out the bag burst in my hand. Now my hand was completely covered in caramel. I had none spare and anyway the pie was now covered with splats of caramel. I hoped I’d be able to maybe just spread it all over but it just stuck all over my hand and was a total mess.

Overall it looked like a poop in a pie dish. I was pretty disappointed.

Judging:

Bruno and Rochelle both noticed it did not look very appetizing. Bravely they went ahead and tasted it anyway – they are both pros. Bruno liked the crust and they both thought it tasted great. So may have scraped through that again. Not feeling confident though!

Overall:

Bit disappointed. Made a silly mistake and I think it would otherwise have been pretty good.

Please follow and like us: